Understanding Dental Crowns: A Trusted Solution in Rolling Hills

A close up of dental instruments with a tooth in the middle

What Are Dental Crowns?
Dental crowns are custom-made, tooth-shaped caps that cover damaged or weakened teeth. They effectively restore the tooth's size, shape, and function, enhancing your smile’s appearance and durability. Whether the damage is due to decay, a fracture, or a root canal procedure, dental crowns offer a reliable solution for lasting protection and aesthetics.


When Are Dental Crowns Recommended?
Crowns are typically advised when a tooth has suffered extensive decay, a fracture, or following root canal treatment. These caps distribute biting forces evenly across the tooth, reducing stress on damaged areas.


Types of Dental Crowns: Choosing the Best Material for Your Smile

Dental Crowns in Rolling Hills, you can access a wide range of dental crown materials to suit your functional and aesthetic needs. Here’s an overview of the options:


  • Porcelain Crowns:
  • Ideal for Front Teeth: Porcelain closely matches natural tooth color, making it a preferred option for visible teeth.
  • Stain Resistant: Resists discoloration, ensuring your smile stays bright over time.
  • Ceramic Crowns:
  • Durability: Ceramic crowns offer a strong balance between durability and aesthetics.
  • Gentle on Gums: Ideal for patients with sensitive gums or allergies to metal.
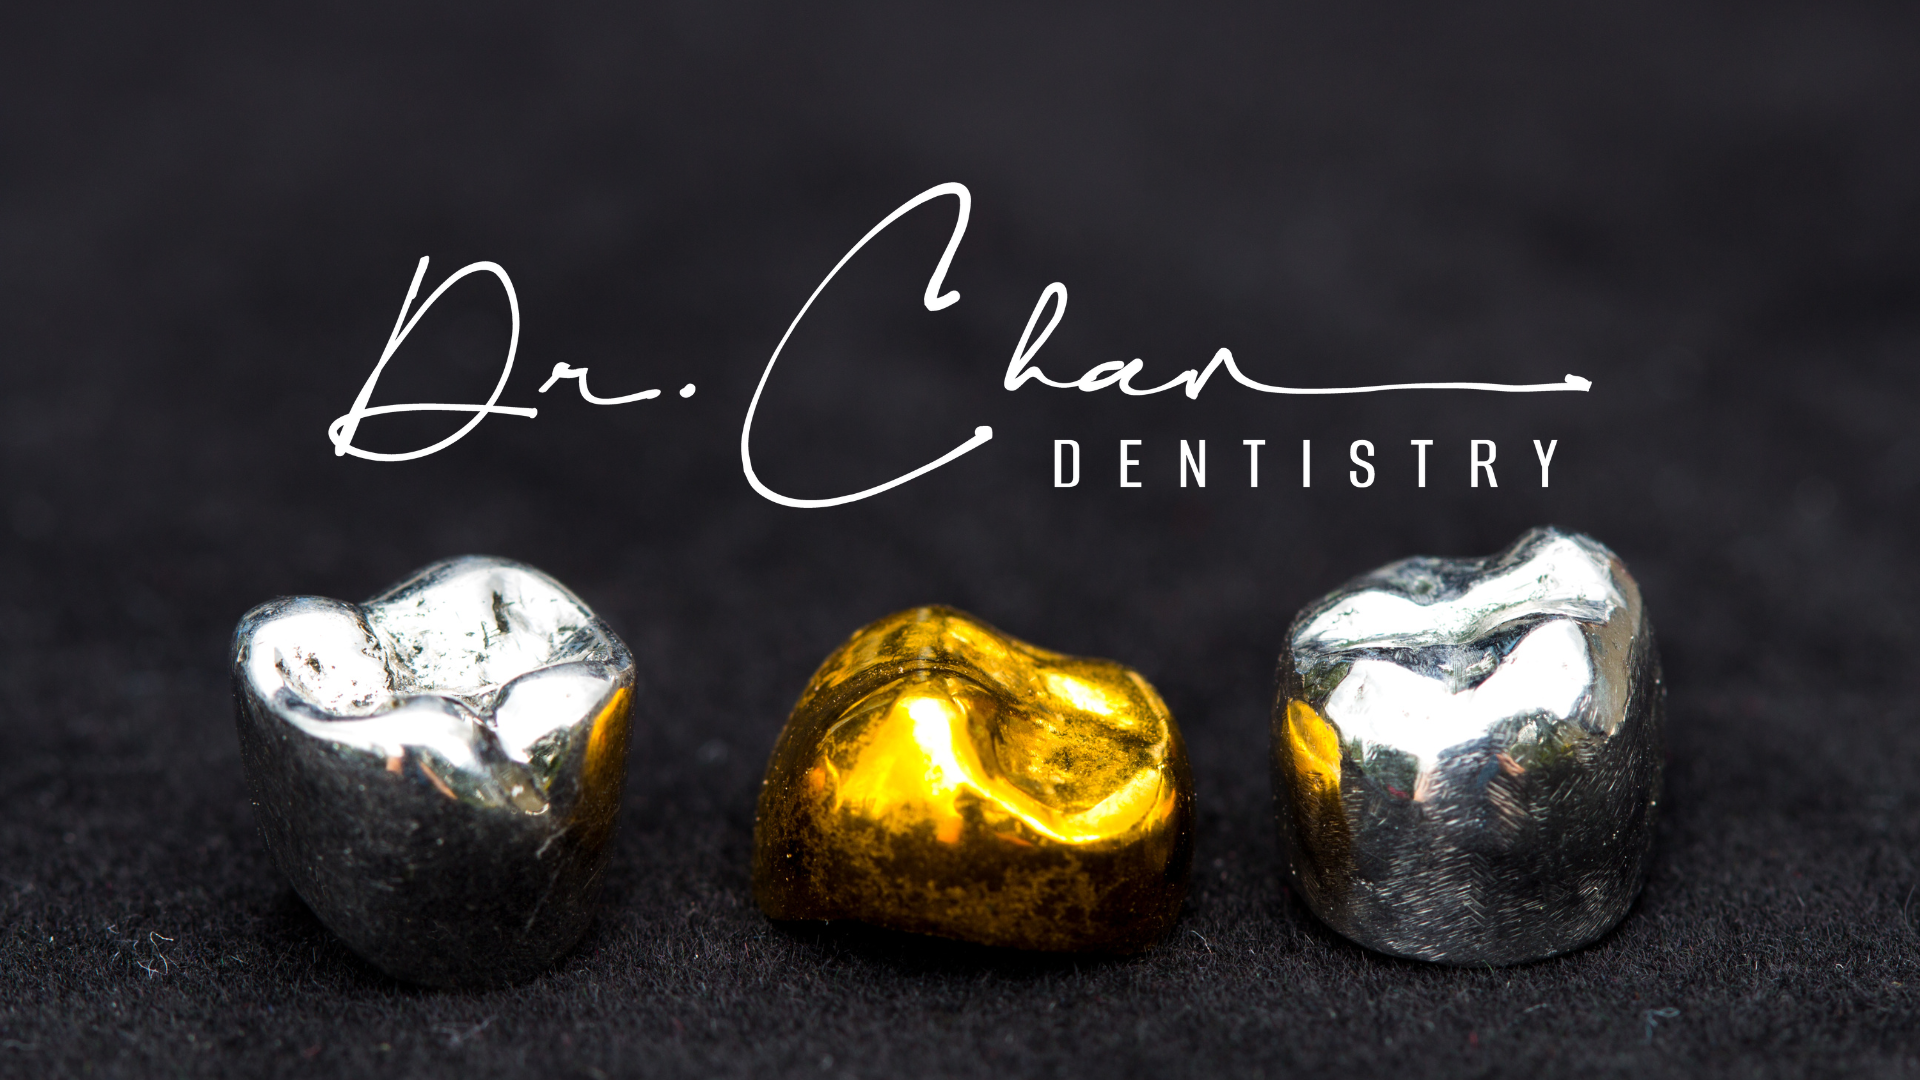
  • Metal Crowns (Gold or Other Alloys):


  • High Strength: Extremely durable and ideal for back teeth, where chewing forces are highest.
  • Minimal Tooth Removal: Requires less preparation than other materials, preserving more of the natural tooth.


  • Porcelain-Fused-to-Metal Crowns:


  • Best of Both Worlds: Combines strength with a natural look, suitable for both front and back teeth.
  • Durability with Aesthetics: The metal core provides strength, while the porcelain exterior maintains a natural appearance.


  • Composite Resin Crowns:


  • Cost-Effective: Usually more affordable, often used as a temporary solution.
  • Easily Repairable: Can be adjusted or repaired without requiring a full replacement.


The Dental Crown Procedure at Dr. Chan Dentistry

At Dr. Chan Dentistry, we follow a step-by-step process to ensure your crown is crafted for an ideal fit and appearance.


  • Initial Consultation
  • Exam and X-rays: Assessing the tooth’s condition.
  • Discussing Options: Reviewing the most suitable crown material for you.
  • Tooth Preparation
  • Numbing and Shaping: The tooth is numbed and shaped to create a stable foundation for the crown.
  • Impression for Customization: An impression is taken for a perfect fit, ensuring a seamless look.
  • Temporary Crown Placement
  • Protective Measure: While your permanent crown is being crafted, a temporary crown will protect your tooth, allowing normal eating and speaking.
  • Permanent Crown Fitting
  • Final Adjustments and Placement: Once the permanent crown is ready, it is carefully fitted, adjusted for comfort, and permanently secured.


Benefits of Dental Crowns: Why Rolling Hills Patients Trust Dr. Chan Dentistry

Protect and Restore
Dental crowns act as a shield, preserving weakened teeth and restoring their functionality, allowing you to chew and speak with ease.


Natural Appearance
With options like porcelain and ceramic, your crown can be matched to your natural tooth color, blending seamlessly with your smile.


Long-Lasting Durability
Dental crowns can last anywhere from 5 to 15 years or more with good care, providing a lasting solution for dental health and aesthetics.


Caring for Your Dental Crown: Tips for Longevity

  • Oral Hygiene
  • Brush Twice Daily: Use fluoride toothpaste to prevent plaque buildup around the crown.
  • Floss Daily: Keep the area around the crown free from food particles.
  • Avoid Damaging Foods
  • Steer Clear of Hard and Sticky Foods: These can crack or loosen your crown. Opt for softer foods to protect your dental work.
  • Routine Check-Ups
  • Regular visits to Dr. Chan Dentistry ensure your crown remains in good condition and any potential issues are addressed early.


Why Choose Dr. Chan Dentistry in Rolling Hills for Your Dental Crown

Expert Care and Precision
Dr. Chan Dentistry is equipped with advanced technology and skilled technicians who ensure each crown is crafted to perfection. Our team is dedicated to ensuring you feel comfortable and confident in your treatment decisions.

State-of-the-Art Facilities
Our clinic provides a clean, welcoming environment with access to the latest dental materials and technology, ensuring quality care for every patient.

Convenient Location and Flexible Hours


Located in Rolling Hills, Dr. Chan Dentistry offers flexible hours and easy access, making it convenient for busy schedules.


Final Thoughts on Dental Crowns

Dental crowns are a proven way to restore damaged teeth, improve your smile, and protect oral health. At Dr. Chan Dentistry in Rolling Hills, we offer personalized care and a variety of crown options tailored to meet your needs. Whether you need a durable crown for a back tooth or an aesthetic option for a front tooth, we ensure that your new crown will blend beautifully with your smile and provide years of functionality.

By Dr. Michael Chan February 13, 2024
Introduction The inspiration behind this dish came from Michelin-starred chef Carlos Cracco’s sea urchin and coffee risotto. I was watching a TV program called “In Search of Perfection: Reinventing Kitchen Classics”, and I was intrigued. I had a crack at the unique combination and what a match made in heaven! The coffee itself adds a roasted note, which adds a wonderful complexity to this recipe. While the preparation may be simple, the secret behind this dish is in the quality of the ingredients. Ingredients Wild sea urchin (any Japanese market such as Tokyo Central, Mitsuwa, or Nijiya market will do) 2 cauliflower florets sliced approx. 0.5 cm (only flat ends) High quality white bread (my favorite is the white bread from the Japanese market, Mitsuwa) 9-12 salmon roe per serving 0.5 tsp instant coffee powder Generous knob of unsalted butter Dill Steps In a nonstick pan, heat butter and brown both sides of the cauliflower slices (about 3-4 per serving) until tender with a toothpick. Sprinkle the coffee powder delicately and cook for a further 20 seconds. Season to taste and set aside. Remove crust from bread and slice in rectangular shapes (width should be slightly narrower than the width of the cauliflower florets). We want the edges of the cauliflower to slightly cover the bread when plating. In another non-stick pan, melt the butter and toast both sides of the bread. Set aside on a paper towel to absorb excess fat. Plating Place a small dollop of soft butter in the center of plate followed by the toasted bread. This will ensure a stable foundation. Arrange cauliflower in the same direction along the piece of bread followed by the urchin. Urchin is extremely delicate and can easily bruise. Use a small teaspoon to arrange. On a small teaspoon, arrange 3 sets of salmon roe evenly spaced on top of the urchin. Please note plating in odd numbers are typically more esthetically pleasing. Followed by a small piece of dill on each salmon roe arrangement. Enjoy as a starter!
An Image of Dr. Chan's Beer Battered Chicken Nugetts
By Dr. Michael Chan December 28, 2023
McDonalds chicken nuggets have always been a childhood favorite of my brother's and mine. We would try to work out with each ones were dark meat, and they were normally horseshoe shaped. I created this recipe shortly after I was happy for the batter I make for fish and chips. The nostalgia always gets me and I hope you enjoy this dish as much as I do!
By Dr. Michael Chan October 23, 2023
Ingredients 1-2 baby gem or butter lettuce 1 pound of jumbo shrimp with shells Finely chopped dill (to taste) Lemon (to taste) Kewpie sesame dressing (to taste) Shiso dressing (to taste) Tabasco (to taste) 2 ripe avocados Steps The shrimp In a large non-stick pan, heat olive oil until smoking, add the shrimp and a pinch of salt. Color both sides until golden orange. When the shrimp are ready, allow them out onto a cutting board to cool. De-shell the shrimp and cut into 3 to 4 pieces. Taste and check seasoning. Keep the shells and infuse in fish or chicken stock for risotto. Place in a bowl and add sesame dressing, dill, Tabasco, and lemon. Avocado mousse Peel, deseed, and blend avocados until smooth. If you do not have a blend, crush the avocado with a fork and pass through a strainer or fine sieve. Add a squeeze of lemon and a pinch of salt. Taste. The salad Toss the shredded lettuce with a generous amount of the shiso dressing. Plating Using a medium to large ring mold, spread the avocado mousse evenly in one layer. Check the seasoning with the shrimp once more and line the next layer with the shrimp. Pack a good amount of the salad as the final layer. Carefully lift the ring mold and serve immediately. Alternative Shrimp Cocktail Wrap Instead of the avocado mousse, simply cut the avocados into cubes, mix them with the shrimp, and serve in hearts of lettuce leaves.
By Dr. Michael Chan June 14, 2023
Ingredients A pack of short ribs typically contains 4-5 pieces (Boneless preferred) Handful of coarsely chopped celery (roughly the same quantity as onions and carrots) ½ yellow onion (medium) coarsely chopped 2 coarsely chopped medium carrots 3 cloves of coarsely chopped garlic 1/3 – 1/2 bottle of red wine (Trader Joe’s Tribunal, Phantom, 7 Deadly Sins Zinfandel – something that is really bold) Knorr chicken or beef stock pot / granules 1-2 sprigs of rosemary and generous handful of thyme tied together with butcher’s twine All-purpose flour (enough to coat the short ribs) Approx. 2 tablespoons of tomato paste (enough to coat the vegetables until everything turns red) Salt (to taste) Pepper (to taste) Steps Pre-heat oven to 300 degrees Fahrenheit. Dust the short ribs with all-purpose flour. Heat a non-stick pan, add olive oil, brown all sides of the short ribs, and set aside. Heat an oven safe pot (preferably a cast iron one) with olive oil and sweat the garlic, carrots, celery, and onions (approx. 6-8 min). Add tomato paste enough to coat all the vegetables and cook out for about 2 minutes. Add the short ribs and herbs. Add red wine (enough to submerge all the ingredients) and reduce until alcohol has evaporated. Add beef or chicken stock enough to submerge all ingredients by about 0.5 inch. Bring to a simmer. Check seasoning (should be underseasoned because the reduction will intensify all the flavors). Place the pot in the oven for 2.5 -3 hours. Check seasoning and further reduce until very rich. Sauce should be thick and coat the spoon. Garnish - roasted parsnip chips Ingredients 1 parsnip peeled (like ribbons) Steps Preheat oven to 350 degrees Fahrenheit. In salted boiling water, cook parsnips for one minute, drain and pat dry on paper towels. Place in the fridge for 30 minutes (Tip: The air in the fridge is very dry, and it is a great way to further draw out moisture allowing the product to be extra crispy at the end). Line a baking tray with parchment paper, spread out parsnips on a single layer, drizzle with olive oil. Bake for 15 minutes or until golden and crispy. Serve immediately. Additional Notes This dish should be left overnight and served the following day. It works wonderfully with pasta that has been lightly tossed in olive oil or egg yolk (like a carbonara). Naan bread, short grain rice, or mashed potatoes also work.
By Dr. Michael Chan June 14, 2023
Ingredients (Serves 3) ½ finely diced sweet onion (approx. equal quantities of onion, celery, and carrot) 2 finely diced celery sticks 1 finely diced carrot 250g minced pork (Whole Foods or Bristol Farms sweet Italian sausage is my favorite – approx. 2 , remove casing and crumble) 250g minced beef 25 mL of milk 2 tablespoons of tomato puree 150 mL of passata 200 mL of chicken stock 250g of pasta Parmesan or pecorino to taste Steps Heat olive oil in large Dutch oven (any cast iron pot will work nicely) and fry minced beef and pork. Add a pinch of salt to assist in drawing out the moisture. When golden brown, drain fat, and set aside (Tip: Water will first be removed from the mince and the meat will begin to brown only when fat has been rendered. This will take approx. 5-7 mins). In the same pot, add more olive oil and sweat onion, celery, and carrot until soft. Add a pinch of salt to assist in drawing out moisture. Add mince back into the pot. Add the tomato puree until all the ingredients are nicely coated and cook for about 2 min. Add passata followed with milk. Simmer for 3 minutes. Deglaze pot with chicken stock. Check seasoning (it should be slightly under seasoned as flavors will intensify after simmering). Heat oven to 275 degrees and simmer gently for 1.5 -2 hours until reduced and thickened. It should be very rich. Check seasoning once more and add salt and pepper to taste. Simmer more on stove top if necessary. In a separate pot, boil water and season generously with salt (how the water is seasoned will dictate the taste of the pasta). The recommended time for the egg fettucine is extremely al dente. Drain when cooked to taste. Combine sauce with pasta, shave parmesan or pecorino, and enjoy! (Tip: If you want to go super fancy, grate parmesan into a bowl. Sprinkle loosely into a non-stick pan on medium heat in a web pattern, remove when a light golden brown, and allow to dry on a cooling rack)
Share by: