How to Choose the Right Dentures in Rolling Hills for Comfort and Confidence

A close up of dental instruments with a tooth in the middle

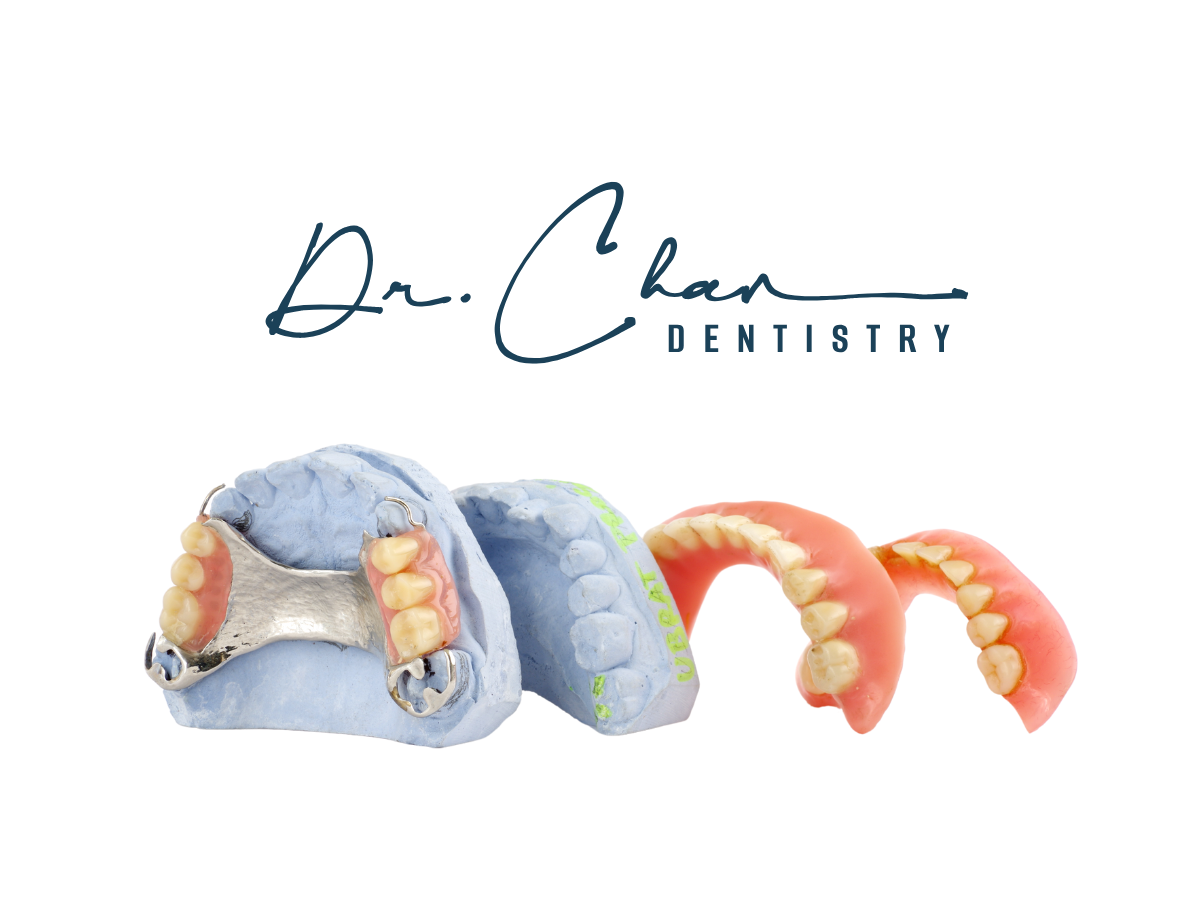
Understanding Different Types of Dentures

Choosing the right dentures is significant, and understanding the different types available is the first step. Not all dentures are the same, and knowing the differences can help you make an informed choice. Let’s break down the most common types of dentures.


Full Dentures: A Comprehensive Guide

Full dentures are used when all natural teeth are missing. They rest on your gums and are custom-made to fit your mouth, restoring your ability to eat, speak, and smile with confidence.


Key Considerations:


  • Adjustment Period – It may take time to get used to wearing full dentures.
  • Maintenance – Regular cleaning is essential to prevent gum irritation and infection.
  • Adhesives – Some patients may need adhesives to keep dentures securely in place.


Partial Dentures: When Are They Suitable?

Partial dentures are ideal for individuals who still have some natural teeth. They fill gaps, prevent remaining teeth from shifting, and restore function.


Why Consider Partial Dentures?


  • More affordable than full dentures
  • Easier to adjust to compared to full dentures
  • Can be used as a temporary or long-term solution


Implant-Supported Dentures: Pros and Cons

Implant-supported dentures provide a more stable and permanent solution by attaching to implants placed in the jawbone.


  • Pros:
    ✔ Greater stability and comfort
    ✔ No need for adhesives
    ✔ Improved ability to chew


  • Cons:
    ✖ More expensive than traditional dentures
    ✖ Requires surgery and a longer healing period
    ✖ Not suitable for everyone (depends on bone density and overall health)


At Dr. Chan Dentistry, we understand that choosing dentures is a personal decision. Our team is here to help you determine the best option based on your lifestyle, budget, and oral health needs.


Assessing Your Personal Needs and Lifestyle

Evaluating Your Oral Health

Before selecting dentures, it's essential to evaluate your oral health. Ask yourself:


  • Do I need a full set of dentures, or can I preserve some of my natural teeth?
  • Have I experienced significant tooth loss or gum disease?
  • Am I looking for a permanent or temporary solution?


A consultation with Dr. Chan Dentistry can help determine the best choice based on your dental history and long-term goals.


Considering Your Daily Activities and Habits

Your lifestyle plays a significant role in your choice of dentures. Here’s what to consider:


  • Activity Level – Are you frequently on the go or lead a more sedentary lifestyle?
  • Diet – Do you eat a variety of foods that require strong, stable dentures?
  • Social Interactions – Do you frequently speak in public or engage in social events?


Budgeting for Your Denture Investment

Dentures are an investment in oral health, so planning for immediate and long-term costs is important.


  • Initial Costs: Get a detailed estimate from Dr. Chan Dentistry to understand the full cost of your dentures.
  • Maintenance Expenses: Factor in regular check-ups, relining, and adjustments.
  • Replacement Costs: Dentures typically need replacement every 5-10 years, depending on wear and tear.


Planning can ensure you get the best dentures for your smile and your budget.


Finding a Reputable Denture Specialist in Rolling Hills

Selecting the right dental professional is crucial to getting dentures that fit well and feel comfortable.


Researching Local Denture Providers

  • Check local directories and patient testimonials.
  • Ask friends or family for recommendations.
  • Visit dental offices to understand their approach and expertise.

Reading Reviews and Testimonials

Look for:


  • Positive feedback on patient care and results
  • Specific mentions of successful denture fittings
  • Comments on the friendliness and professionalism of staff


Consulting with a Dental Professional

Before committing, schedule a consultation and ask:


  • How much experience do you have with dentures?
  • What denture materials and techniques do you use?
  • What post-care support and adjustments do you offer?


At Dr. Chan Dentistry, we provide customized solutions to ensure the best fit and comfort for your dentures.


The Importance of Proper Fit and Comfort

How to Ensure a Perfect Fit

Properly fitting dentures are essential for comfort and functionality. Steps to achieve the best fit include:


  • Professional Assessment – A thorough evaluation ensures accurate measurements.
  • Customized Molds – Dentures are tailored to fit the shape of your mouth.
  • Regular Adjustments – Your mouth may change over time, requiring slight modifications.


Common Issues with Ill-Fitting Dentures

🚫 Soreness and irritation
🚫 Difficulty chewing or speaking
🚫 Dentures that slip or move out of place


Adjustments and Maintenance Tips

  • Visit your dentist for regular adjustments.
  • Clean dentures daily to prevent plaque buildup.
  • Store them in water or a denture solution when not in use.


Dr. Chan Dentistry ensures that your dentures are comfortable, well-fitted, and designed to last.


Choosing the Right Denture Material

The material of your dentures impacts their durability, appearance, and comfort.


Acrylic vs. Porcelain Dentures

  • Acrylic Dentures: Lightweight, affordable, and easier to adjust.
  • Porcelain Dentures: These are more natural-looking and durable but heavier.

Choosing between them depends on factors like budget, aesthetics, and personal comfort preferences.


Maintaining Your Dentures for Longevity

Daily Cleaning and Care Routines

  • Rinse after meals
  • Brush with a soft-bristled brush and non-abrasive cleaner
  • Soak in a denture solution overnight

When to Schedule Professional Cleanings

Routine dental visits help maintain denture health and function. Dr. Chan Dentistry recommends:

  • Bi-annual check-ups for cleaning and inspection
  • Adjustments when needed to ensure the best fit


Handling Repairs and Replacements

If your dentures crack, chip, or feel loose, visit your dentist immediately—never attempt DIY fixes!


Boosting Confidence with the Right Dentures

Overcoming Self-Consciousness

It’s normal to feel a little hesitant about dentures at first, but the right fit can restore your confidence. Dr. Chan Dentistry offers natural-looking options that blend seamlessly with your facial features.


Enhancing Your Smile Aesthetics

  • Modern dentures are custom-designed for a natural appearance
  • They help maintain facial structure and prevent sagging
  • Custom shading matches your natural teeth color


Social Benefits of Well-Fitted Dentures

A great smile improves self-esteem and helps in professional and social interactions. Properly fitted dentures ensure you can speak clearly and eat comfortably without worry.


Wrapping It Up

Choosing the right dentures in Rolling Hills means balancing comfort, aesthetics, and functionality. Here’s a quick recap:


  • Explore different types of dentures
  • Consider your lifestyle and budget
  • Find a reputable dentist for a personalized fit
  • Maintain proper hygiene and routine check-ups


At Dr. Chan Dentistry, we are committed to helping you regain your smile with the perfect dentures for your needs. Schedule a consultation today!


This blog is for informational purposes only and should not be considered professional dental or medical advice. The content provided is based on general knowledge about dentures and is not intended to replace a consultation with a licensed dental professional.


Individual dental needs vary, and the best denture solution depends on personal health, lifestyle, and professional evaluation. Always consult a qualified dentist, such as Dr. Chan Dentistry or another trusted dental provider, to determine the best course of action for your specific situation.


Dr. Chan Dentistry and the authors of this blog do not guarantee specific results from any denture treatment mentioned. If you experience discomfort, fit issues, or complications with your dentures, seek immediate professional care for appropriate diagnosis and treatment.

By Dr. Michael Chan February 13, 2024
Introduction The inspiration behind this dish came from Michelin-starred chef Carlos Cracco’s sea urchin and coffee risotto. I was watching a TV program called “In Search of Perfection: Reinventing Kitchen Classics”, and I was intrigued. I had a crack at the unique combination and what a match made in heaven! The coffee itself adds a roasted note, which adds a wonderful complexity to this recipe. While the preparation may be simple, the secret behind this dish is in the quality of the ingredients. Ingredients Wild sea urchin (any Japanese market such as Tokyo Central, Mitsuwa, or Nijiya market will do) 2 cauliflower florets sliced approx. 0.5 cm (only flat ends) High quality white bread (my favorite is the white bread from the Japanese market, Mitsuwa) 9-12 salmon roe per serving 0.5 tsp instant coffee powder Generous knob of unsalted butter Dill Steps In a nonstick pan, heat butter and brown both sides of the cauliflower slices (about 3-4 per serving) until tender with a toothpick. Sprinkle the coffee powder delicately and cook for a further 20 seconds. Season to taste and set aside. Remove crust from bread and slice in rectangular shapes (width should be slightly narrower than the width of the cauliflower florets). We want the edges of the cauliflower to slightly cover the bread when plating. In another non-stick pan, melt the butter and toast both sides of the bread. Set aside on a paper towel to absorb excess fat. Plating Place a small dollop of soft butter in the center of plate followed by the toasted bread. This will ensure a stable foundation. Arrange cauliflower in the same direction along the piece of bread followed by the urchin. Urchin is extremely delicate and can easily bruise. Use a small teaspoon to arrange. On a small teaspoon, arrange 3 sets of salmon roe evenly spaced on top of the urchin. Please note plating in odd numbers are typically more esthetically pleasing. Followed by a small piece of dill on each salmon roe arrangement. Enjoy as a starter!
An Image of Dr. Chan's Beer Battered Chicken Nugetts
By Dr. Michael Chan December 28, 2023
McDonalds chicken nuggets have always been a childhood favorite of my brother's and mine. We would try to work out with each ones were dark meat, and they were normally horseshoe shaped. I created this recipe shortly after I was happy for the batter I make for fish and chips. The nostalgia always gets me and I hope you enjoy this dish as much as I do!
By Dr. Michael Chan October 23, 2023
Ingredients 1-2 baby gem or butter lettuce 1 pound of jumbo shrimp with shells Finely chopped dill (to taste) Lemon (to taste) Kewpie sesame dressing (to taste) Shiso dressing (to taste) Tabasco (to taste) 2 ripe avocados Steps The shrimp In a large non-stick pan, heat olive oil until smoking, add the shrimp and a pinch of salt. Color both sides until golden orange. When the shrimp are ready, allow them out onto a cutting board to cool. De-shell the shrimp and cut into 3 to 4 pieces. Taste and check seasoning. Keep the shells and infuse in fish or chicken stock for risotto. Place in a bowl and add sesame dressing, dill, Tabasco, and lemon. Avocado mousse Peel, deseed, and blend avocados until smooth. If you do not have a blend, crush the avocado with a fork and pass through a strainer or fine sieve. Add a squeeze of lemon and a pinch of salt. Taste. The salad Toss the shredded lettuce with a generous amount of the shiso dressing. Plating Using a medium to large ring mold, spread the avocado mousse evenly in one layer. Check the seasoning with the shrimp once more and line the next layer with the shrimp. Pack a good amount of the salad as the final layer. Carefully lift the ring mold and serve immediately. Alternative Shrimp Cocktail Wrap Instead of the avocado mousse, simply cut the avocados into cubes, mix them with the shrimp, and serve in hearts of lettuce leaves.
By Dr. Michael Chan June 14, 2023
Ingredients A pack of short ribs typically contains 4-5 pieces (Boneless preferred) Handful of coarsely chopped celery (roughly the same quantity as onions and carrots) ½ yellow onion (medium) coarsely chopped 2 coarsely chopped medium carrots 3 cloves of coarsely chopped garlic 1/3 – 1/2 bottle of red wine (Trader Joe’s Tribunal, Phantom, 7 Deadly Sins Zinfandel – something that is really bold) Knorr chicken or beef stock pot / granules 1-2 sprigs of rosemary and generous handful of thyme tied together with butcher’s twine All-purpose flour (enough to coat the short ribs) Approx. 2 tablespoons of tomato paste (enough to coat the vegetables until everything turns red) Salt (to taste) Pepper (to taste) Steps Pre-heat oven to 300 degrees Fahrenheit. Dust the short ribs with all-purpose flour. Heat a non-stick pan, add olive oil, brown all sides of the short ribs, and set aside. Heat an oven safe pot (preferably a cast iron one) with olive oil and sweat the garlic, carrots, celery, and onions (approx. 6-8 min). Add tomato paste enough to coat all the vegetables and cook out for about 2 minutes. Add the short ribs and herbs. Add red wine (enough to submerge all the ingredients) and reduce until alcohol has evaporated. Add beef or chicken stock enough to submerge all ingredients by about 0.5 inch. Bring to a simmer. Check seasoning (should be underseasoned because the reduction will intensify all the flavors). Place the pot in the oven for 2.5 -3 hours. Check seasoning and further reduce until very rich. Sauce should be thick and coat the spoon. Garnish - roasted parsnip chips Ingredients 1 parsnip peeled (like ribbons) Steps Preheat oven to 350 degrees Fahrenheit. In salted boiling water, cook parsnips for one minute, drain and pat dry on paper towels. Place in the fridge for 30 minutes (Tip: The air in the fridge is very dry, and it is a great way to further draw out moisture allowing the product to be extra crispy at the end). Line a baking tray with parchment paper, spread out parsnips on a single layer, drizzle with olive oil. Bake for 15 minutes or until golden and crispy. Serve immediately. Additional Notes This dish should be left overnight and served the following day. It works wonderfully with pasta that has been lightly tossed in olive oil or egg yolk (like a carbonara). Naan bread, short grain rice, or mashed potatoes also work.
By Dr. Michael Chan June 14, 2023
Ingredients (Serves 3) ½ finely diced sweet onion (approx. equal quantities of onion, celery, and carrot) 2 finely diced celery sticks 1 finely diced carrot 250g minced pork (Whole Foods or Bristol Farms sweet Italian sausage is my favorite – approx. 2 , remove casing and crumble) 250g minced beef 25 mL of milk 2 tablespoons of tomato puree 150 mL of passata 200 mL of chicken stock 250g of pasta Parmesan or pecorino to taste Steps Heat olive oil in large Dutch oven (any cast iron pot will work nicely) and fry minced beef and pork. Add a pinch of salt to assist in drawing out the moisture. When golden brown, drain fat, and set aside (Tip: Water will first be removed from the mince and the meat will begin to brown only when fat has been rendered. This will take approx. 5-7 mins). In the same pot, add more olive oil and sweat onion, celery, and carrot until soft. Add a pinch of salt to assist in drawing out moisture. Add mince back into the pot. Add the tomato puree until all the ingredients are nicely coated and cook for about 2 min. Add passata followed with milk. Simmer for 3 minutes. Deglaze pot with chicken stock. Check seasoning (it should be slightly under seasoned as flavors will intensify after simmering). Heat oven to 275 degrees and simmer gently for 1.5 -2 hours until reduced and thickened. It should be very rich. Check seasoning once more and add salt and pepper to taste. Simmer more on stove top if necessary. In a separate pot, boil water and season generously with salt (how the water is seasoned will dictate the taste of the pasta). The recommended time for the egg fettucine is extremely al dente. Drain when cooked to taste. Combine sauce with pasta, shave parmesan or pecorino, and enjoy! (Tip: If you want to go super fancy, grate parmesan into a bowl. Sprinkle loosely into a non-stick pan on medium heat in a web pattern, remove when a light golden brown, and allow to dry on a cooling rack)
Share by: